Home > Teaching > Injection Techniques > Basal Thumb Arthritis Injection
Basal Thumb Arthritis Injection
This section of our website contains general information only. The information is not advice, and should not be treated as such.
You must not rely on the information on this website as an alternative to medical advice from your doctor or other professional healthcare provider.
You should never delay seeking medical advice, disregard medical advice, or discontinue medical treatment because of information on this website.
Beware…
- Superficial radial nerve branches.
- Skin pigmentation.
This is a difficult joint to inject if the patient is not relaxed. Often osteophytes make it difficult to enter the joint.
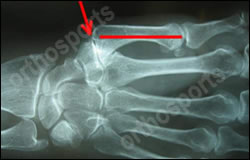
Turn x-ray through 90 degrees so that it is orientated the same way as the hand when resting on the bed. Note the 20 – 30 degree inclination of the joint to the long axis of the forearm.
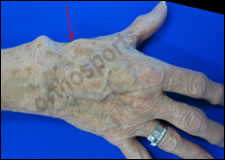
Mark the joint with thumb nail – base thumb metacarpal just dorsal to the first dorsal compartment tendons, e.g. EPB tendon.
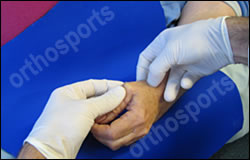
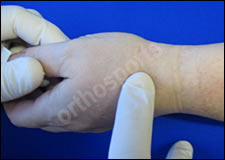
Clean with alcohol swab.
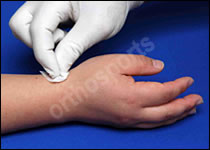
Support the injecting hand hypothenar eminence on patient’s hand.
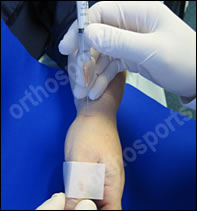
1ml Celestone + 1 ml Lignocaine plain with 2.5ml syringe and 25G short needle.
Aim to inject – just proximal to the base of the thumb metacarpal.
Insert a small amount of the solution immediately under the skin and wait 20- 30 seconds. This will give the local anaesthetic some time to start working.
If you hit bone withdraw slightly and inject a small amount more. You can then move the thumb slowly with your other hand to see if the needle is hitting bone proximal or distal to the joint. If the needle moves it is hitting the thumb metacarpal.
Once the peri-articular region is more comfortable the joint can be distracted with your non-dominant hand to allow easier entry into the joint.
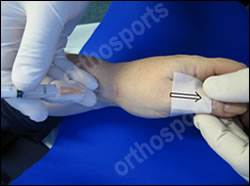
Often one feels a “pop” when one enters the joint and the fluid can be injected with ease.
The volume of the joint is very variable but usually 0.5 – 1 ml. If it is a very tight joint, note the small volume of fluid actually in the joint as this may correlate to a poorer response to the cortisone injection.
Don’t overfill the joint with fluid as this can be very painful when the local anaesthetic wears off.
When the joint feels full let go of the syringe plunger a note the pressure will push fluid back into the syringe if the needle is truly in the joint. Re-insert the fluid back into the joint with gentle pressure and then withdraw the syringe out of the joint.
Put the rest of the fluid just outside the joint.
Remove the needle completely and apply pressure with alcohol swab then apply bandaid.
Apply a crepe bandage up around thumb.
Encourage patient to rest the affected site – e.g. apply crepe bandage or a splint if necessary.
After a joint injection, inform the patient to ‘take it easy and have Panadeine when you get home”.
Document the percentage relief of symptoms from the local anaesthetic and ask patient to return in 4 weeks if symptoms persist.
For further information, refer to Hand Injections – General.
